How To Use The Blog Features In Weebly
In this guide, we'll show you how to add a fully functioning blog to your Weebly website with just a few lines of code.
Weebly is great for building clean and rich websites, but the blogging experience can be slow and hard to grapple with. The drag and drop editor gives you immense control... but doesn't let you focus on your writing. To some, Weebly can feel like an overwhelming editing experience. Using DropInBlog with your existing Weebly website lets you extract the blog, meaning your content creators can focus on blogging and you can focus on the website structure and layout.
Prerequisites
You'll need to create a DropInBlog account, which you can do for free with a 14-day trial, and you'll need an existing Weebly website.
Creating a blog page
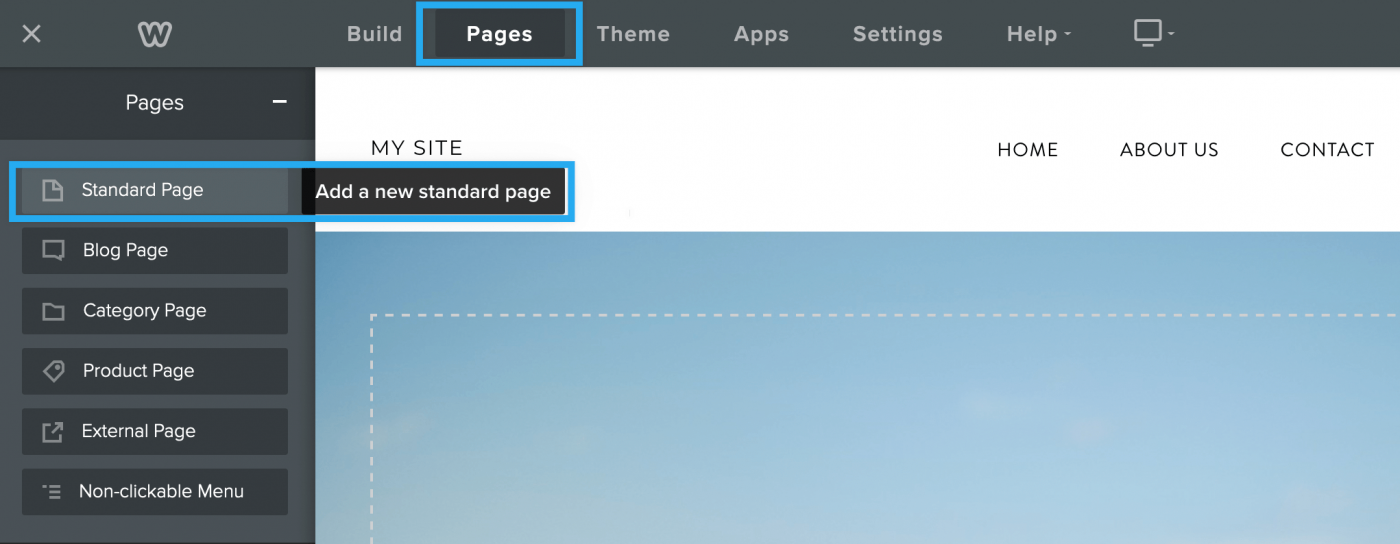
Navigate to the Weebly website builder, select Pages in the main navigation and hit the plus, +, icon to create a new Standard Page.

In the new page options choose a name for the blog page. I'm going to go with the imaginative name of "Blog". Note that this name will be used for the page slug too.
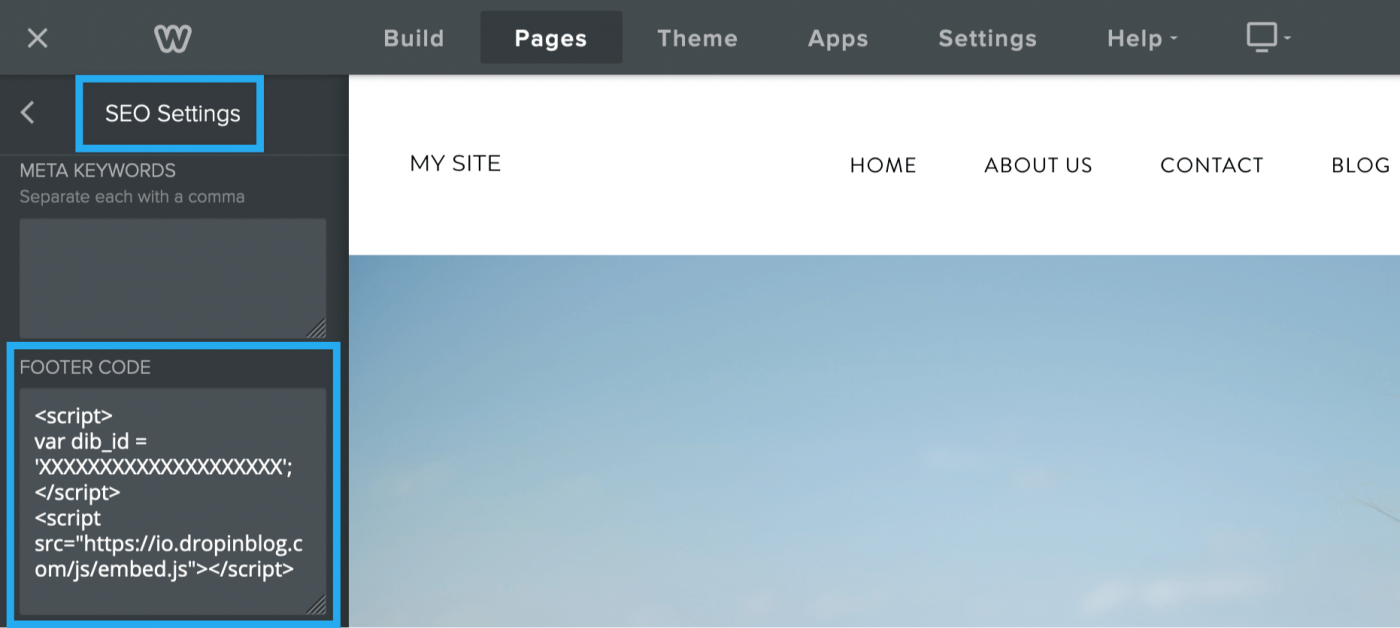
Next, select SEO Settings and locate the Footer Code field. Here we'll be adding the DropInBlog script.
Open a new browser window, head over to your DropInBlog account, and select Code & Layout from the main navigation. In the Blog Code steps copy the code shown in Step 1. It looks something like this:
<script> var dib_id = 'XXXXXXXXXXXXXXXXXXX'; </script> <script src="https://io.dropinblog.com/js/embed.js"></script>
Switch back to your Weebly website builder and paste the code into the Footer Code field. Hit the back arrow in the top left and then Done.

Tip: You can copy or paste the code by selecting the area with your cursor and right-clicking it, you'll then be shown the option to copy or paste.
Now that we've set up the new page and connected it to our DropInBlog account, we can insert the blog posts into it.
Integrating the blog posts
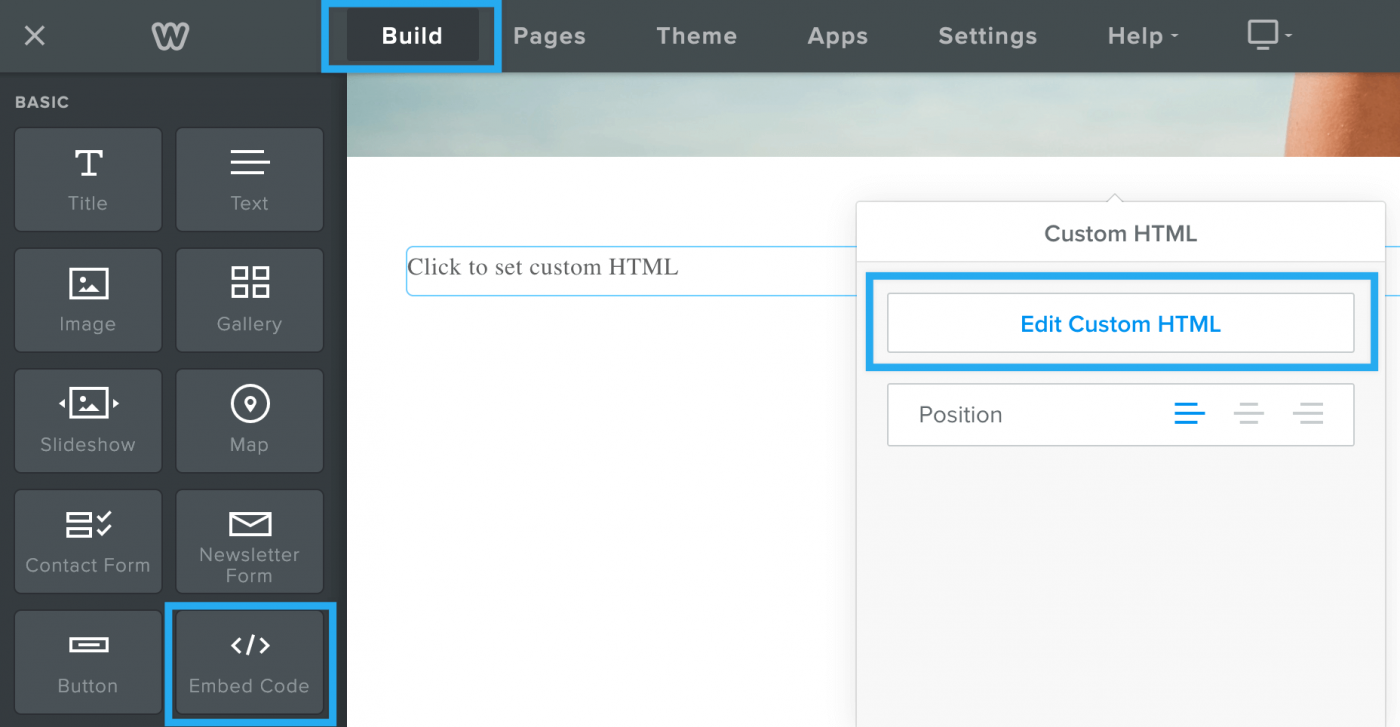
Open the newly created page in the Weebly builder and switch to the Build option in the main navigation.
Locate the Embed Code block in the sidebar and drag it onto your newly created blog page. Select the block you created and hit Edit Custom HTML.

Once in this editing mode, switch back to DropInBlog and copy the code shown in Step 2, which looks like this:
<div id="dib-posts"></div>
Go back to Weebly and paste the code into the custom HTML area.
The final steps are to define the blog page URL within DropInBlog, and to publish your website changes at Weebly.
Publishing your new blog
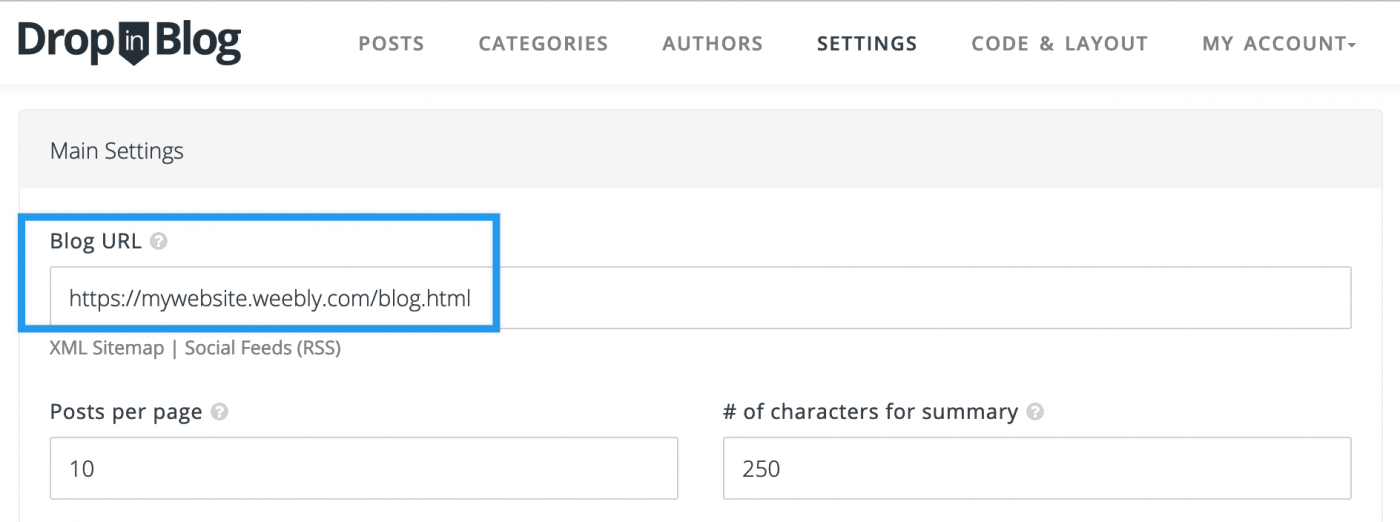
Head over to DropInBlog and select Settings from the main navigation. Locate the Blog URL field and add your Weebly blog URL. This will be your website domain followed by your page slug. For example, my blog URL and slug is: https://mywebsite.weebly.com/blog.html. You can find out your website domain in Weebly by selecting the Settings item in the main navigation. The page slug will be created from your page title followed by .html, however you can set this in the page SEO Settings.

Hit Save All Changes in the DropInBlog settings and switch back to Weebly.
Finally hit Publish in the top right corner of your Weebly editor. After that, Weebly will work on publishing your website changes and give you a link to your website. Navigate to your new blog page to test out your new and fully functioning blog! ✨

Tips for using Weebly
Your newly created blog will automatically take on the styling from your website and match your branding. However, if you'd like, you can add custom styles within Weebly using another Embed Code block on the page and adding your own custom CSS. When using the Custom HTML block you'll need to wrap your CSS in style tags like this: <style>…</style>
Once your DropInBlog account has been integrated with Weebly, there will be no need to login to Weebly to create new blog posts. You can create your posts directly in your DropInBlog account and they will be automatically published on your Weebly website.
If you still need some assistance getting set up please do get in touch and we'll be more than happy to help out. ⛑
How To Use The Blog Features In Weebly
Source: https://dropinblog.com/blog/how-to-create-a-blog-on-weebly-integration-tutorial/
Posted by: myersgrell1966.blogspot.com

0 Response to "How To Use The Blog Features In Weebly"
Post a Comment